In today’s digital world, user experience on websites is crucial for success. A central element of this experience is navigation, i.e., the main menu of a website or shop. In this article, we dive deep into the world of WordPress navigation. We will cover the basics of menu creation in WordPress, the advantages of mega menus, the use of the Customizer for menu design, and finally, best practices for effective navigation as well as the correct way to edit the WordPress menu.
Editing WordPress Menus (Header Navigation) – Guide, Help, Tips, Tricks & Extensions
Note: Synonyms for menu are navigation, menu bar, header navigation, navigation menu, dropdown menu, main menu.
1. Introduction to WordPress Menus
A WordPress menu serves as a central navigation element of a website. It allows visitors to efficiently move through the various pages and content. A well-designed navigation is crucial for user experience and can make the difference between a visitor staying on the page or leaving it.
2. Fundamentals of WordPress Navigation
In WordPress, there are various terms that refer to navigation. Although the terms menu, Menu, and navigation menu are often used synonymously, they all refer to the same concept: a collection of links that help visitors find their way around the website. The menu settings in WordPress are intuitive and can be found in the dashboard under „Appearance“ > „Menus“.
Further down in the article, we also show really good themes with many menu functions and plugins as an addition.
Video on editing the menu as well as further hints, tips & tricks:
3. Creating a New WordPress Menu
Creating a new menu in WordPress is a simple process. First, navigate to the menu section in the dashboard. Here you can create a new main menu, add pages, posts or categories, and define the location of the menu, be it in the header, footer or sidebar.
Become more visible on Google & Social Media?
In a free strategy consultation for data-driven online marketing, we uncover your untapped potential, review any existing ad accounts if necessary, examine your SEO ranking and visibility, and determine which strategy is appropriate for your budget and which active measures will lead to more inquiries or sales.

✅ More visibility & perception through targeted placement
✅ More visitors > prospects > customers > revenue
✅ Reach target groups scalably with SEA
✅ Act and grow sustainably with SEO
🫵 Maximum success with our hybrid strategy
💪 More than 15 years of experience across industries in over 1,000+ projects demonstrable!







Creating a menu in WordPress is a crucial step to enable visitors to navigate your website in a structured way. Here is a step-by-step guide:
3.1. Accessing the Menus Area
- Log in to your WordPress dashboard.
- In the left sidebar, navigate to „Appearance“ and then to „Menus“.
3.2. Creating a New WordPress Menu
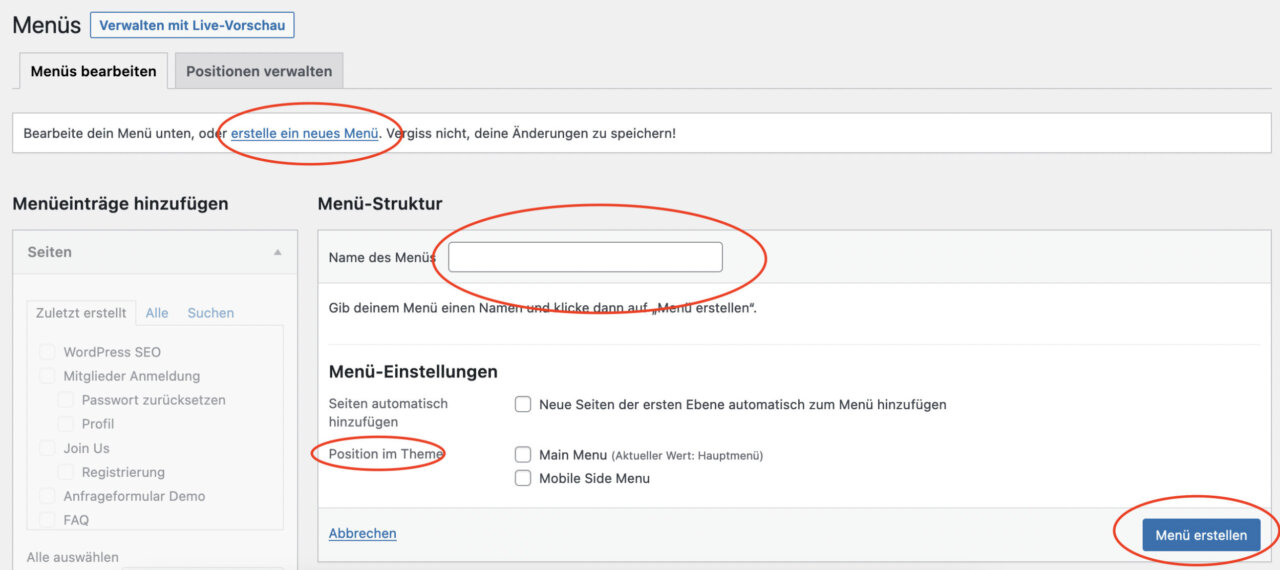
- Click the "Create new menu" button.
- Give your menu a name.
This is primarily for internal organization and is usually not displayed on the website. - (optional) Select position -> depending on usage
- Save
3.3. Adding content to the menu
- On the left side, you will see various boxes such as „Pages“, „Posts“, „Custom Links“, and „Categories“.
- By clicking on the respective box, you can add content to your menu. For example:
- Under „Pages“, you can add existing pages of your website to the menu.
- "Custom Links" allows you to add external links or specific URLs.
- With "Categories", you can insert direct links to specific blog categories.
Additional tip and generally a trick in WordPress:
At the top right, almost everywhere in the WP backend, there is the „tab to expand“ SCREEN OPTIONS:

Depending on the theme and plugins used, further taxonomies (content types) can be displayed here on the left in the menu bar to easily add, for example, WooCommerce product categories or portfolio reference articles, etc.
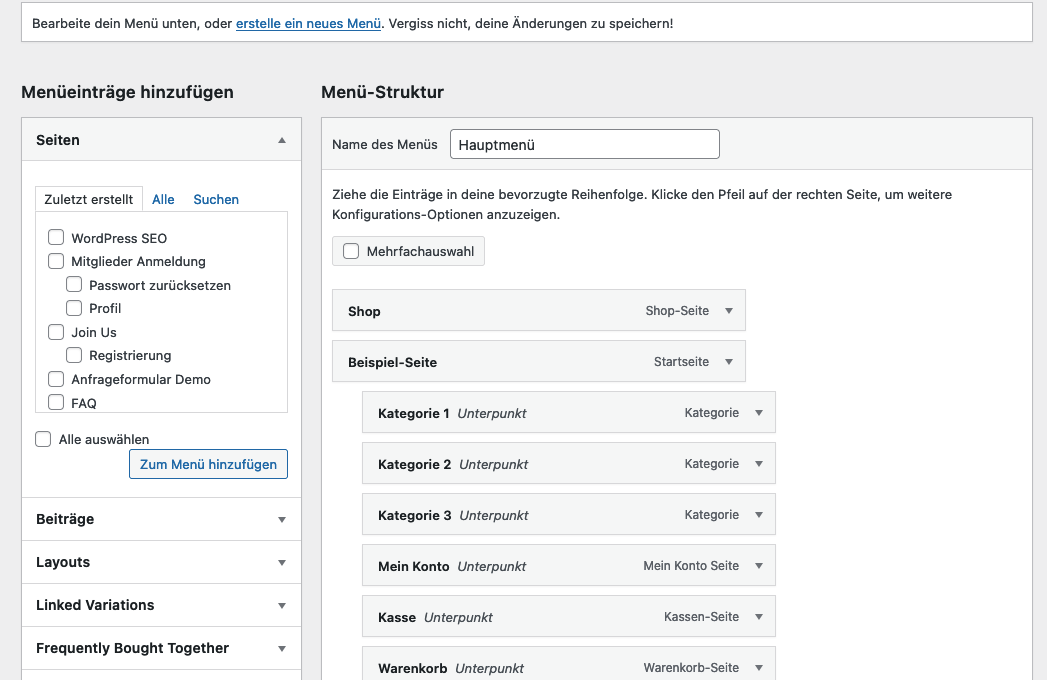
3.4. Organizing Menu Structure / Managing Menu Items in WordPress
- After you have added content, it will appear in the right menu structure box.
- Here you can change the order of menu items by drag and drop.
- To create a dropdown menu, drag a menu item slightly to the right under another menu item. This will then be displayed as a sub-item or sub-menu.
1. Accessing the Menu Area
- Log in to your WordPress dashboard.
- In the left sidebar, navigate to „Appearance“ and then to „Menus“.
2. Select the menu to edit
- If you have multiple menus, make sure you select the correct menu from the dropdown list above and click „Select Menu“.
3. Edit Menu Structure
- In the right menu structure box, you will see all the menu items of your selected menu.
- To change the position of a menu item, click on the menu item and drag it to the desired location. This is done via drag-and-drop.
- For dropdown menus or submenus, drag the menu item slightly to the right, under the parent menu item.
After you have adjusted the positions and locations of your menu, you should visit your website and check if everything is displayed as desired. It is always good practice to check the functionality after every change.
3.5. Set Menu Location
- Below the menu structure, you will find the „Menu Locations“ option. Here you can define where the menu should be displayed on your website, e.g., as the main menu,footer menu, or in a sidebar.
- Depending on your WordPress theme, different menu locations may be available.
- Select the desired locations and ensure that no other menu uses the same location to avoid conflicts.
3.6. Save Changes
- Don't forget to click "Save Menu" to apply your changes.
With these steps, you have successfully created a new menu in WordPress. It is advisable to visit your website and check if the menu is displayed correctly and all links are working.
Creating Menus in the WordPress Customizer
The WordPress Customizer is a powerful tool that provides a live preview of your changes as you customize various aspects of your website. One of these aspects is menus. The advantage of the Customizer lies in its intuitive user interface and the ability to see changes in real-time before they are published.
How to create menus in the Customizer:
- Accessing the Customizer: Log in to your WordPress dashboard and navigate to „Appearance“ > „Customize“.
- Menu Section: In the Customizer, you will find various options on the left side. Click on "Menus".
- Add New Menu: Click on "Create New Menu". Give your menu a name and choose a menu location (e.g., Primary Menu, Footer). Click "Next".
- Add Menu Items: Click on „Add Items“. Here you can add pages, posts, custom links, and categories to your menu.
- Adjusting the Menu Structure: After adding items, you can change their order by dragging and dropping them, or make them sub-menu items by moving them slightly to the right.
- Publishing Changes: Once you are satisfied with your menu’s design, click „Publish“ at the top of the Customizer to make the changes live.
The Customizer offers a visual and interactive way to create and customize menus. It allows you to see the structure and design of your menu in real-time, making the process transparent and user-friendly. It is particularly useful for WordPress beginners or for those who want immediate visual feedback on their design decisions.
4. Editing an Existing Menu
If you have already created a menu in WordPress and wish to make changes, you can add, edit, or delete menu items. The order of menu items can be adjusted by dragging and dropping. For a deeper menu bar or header navigation you can also create dropdown menus by dragging menu items under a main menu item.
5. Advanced Menu Options
The customization options in WordPress are almost limitless. You can individually design the menu bar, add custom links, or even display categories and tags in your navigation menu. The dropdown menu offers an additional level of organization, especially useful for websites with many pages or content.
6. Troubleshooting and Common Errors
Sometimes your menu or dropdown menu may not work as expected. This can be due to a theme issue, plugin conflicts, or other technical problems. A common problem is also the lack of responsiveness of menus on mobile devices. It is important to regularly check the functionality of your navigation and ensure that it is displayed correctly on all devices.
7. Best Practices for Effective WordPress Navigation
A clear and intuitive navigation is crucial for the user experience. It is important to keep the menu bar and the main menu clear and ensure that all links work. SEO optimization is also crucial. A well-structured navigation menu can help search engines better understand and index the content of your website.
Important: Be sure to also check out the next point on mega menus and sticky elements!
8. Additional Resources and Tools
There are many plugins and tools that can help you extend and improve your WordPress navigation. Some plugins offer advanced features such as mega menus or sticky menus. There are also numerous tutorials and courses that delve deeper into the topic of „editing WordPress menus“ and can help you expand your skills.
Mega Menus in WordPress
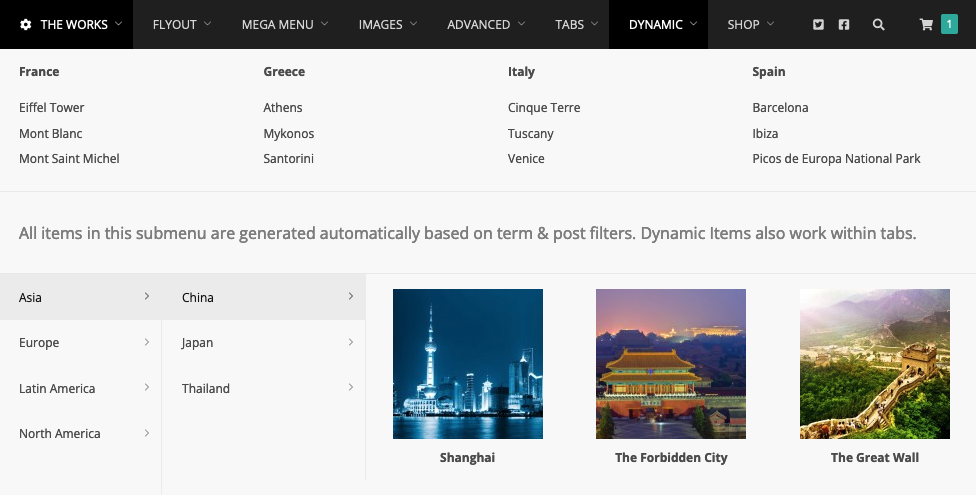
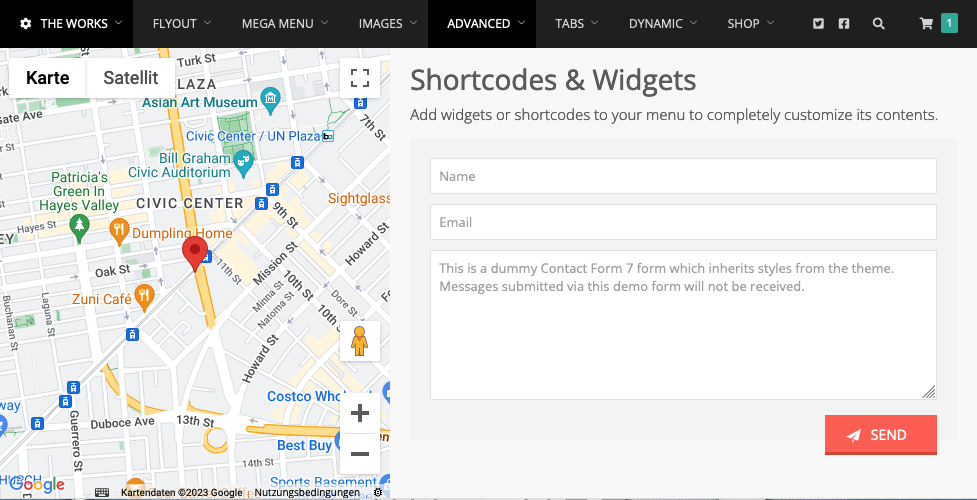
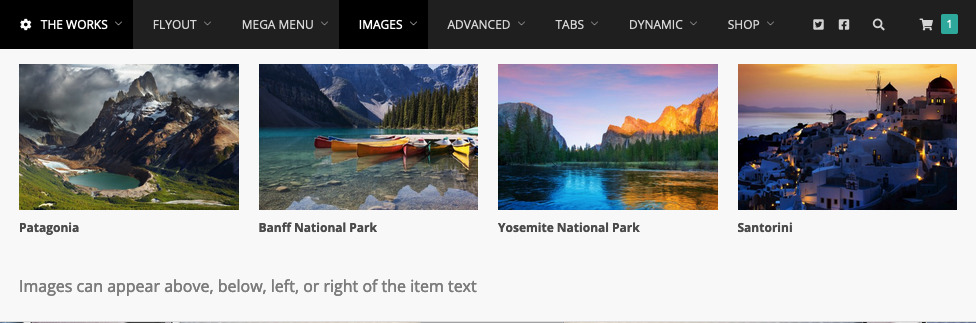
What are Mega Menus? Mega menus are advanced dropdown menus that can contain not only simple links but also other content such as images, text blocks, videos, and more. They are particularly useful for websites with a large number of pages or content, as they enable clear and organized navigation.
Advantages of Mega Menus:
- Structured Navigation: You can organize content into categories or subcategories.
- Visual Elements: Integrate images or icons to make the menu more appealing.
- Extended Content: In addition to links, you can display text blocks, products, images, and other elements.
Implementing Mega Menus with a WordPress Theme
Some modern WordPress themes already offer integrated mega menu functions. If you are using such a theme:
- Theme Selection: Choose a theme that offers native support for mega menus. This is often highlighted in the theme descriptions or features.
- Theme Options: After installing and activating the theme, navigate to the theme options. Specific settings for mega menus should be available here.
- Menu Creation: Create your menu as usual and use the advanced options to add content to the mega menu.
Implementing Mega Menus with a Plugin
If your current theme does not offer a mega menu function, you can use a plugin to add this functionality. Here are the steps:
- Plugin Selection: There are several popular mega menu plugins for WordPress, such as „Max Mega Menu“ or „WP Mega Menu“. Search the WordPress plugin directory or research online to find the right one for your needs.
- Plugin Installation: Install and activate the chosen plugin via the WordPress dashboard.
- Plugin Configuration: After activation, you should see a new menu option or section in the dashboard specifically for the mega menu plugin. Here you can configure and design your mega menu.
- Menu Creation: Create your menu and add the desired content. The plugin should offer you advanced options to add various content to the mega menu.
Important Notes:
- Ensure that your mega menu is not too cluttered. An overloaded menu can negatively impact the user experience.
- Test the mega menu on various devices to ensure it is responsive and user-friendly.
- Pay attention to loading times. A mega menu with many images or content can affect your website's loading speed.
In summary, mega menus offer an effective way to present extensive content and links in an organized and visually appealing manner. With the right theme or plugin, you can easily add this functionality to your WordPress website.
Recommendation for arguably the best WordPress Mega Menu Plugin:
Almost 100,000 plugin sales and almost exclusively positive reviews!
Examples of Mega Menus in WordPress:
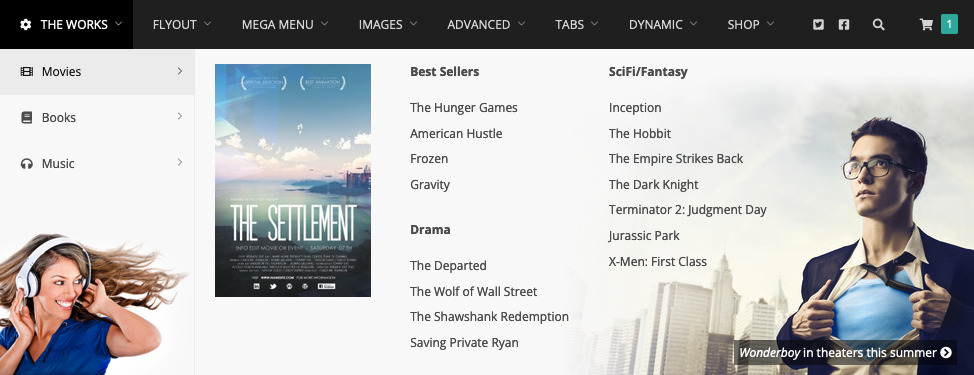
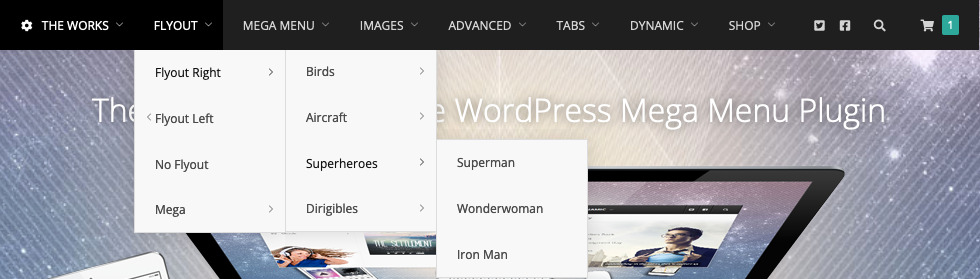
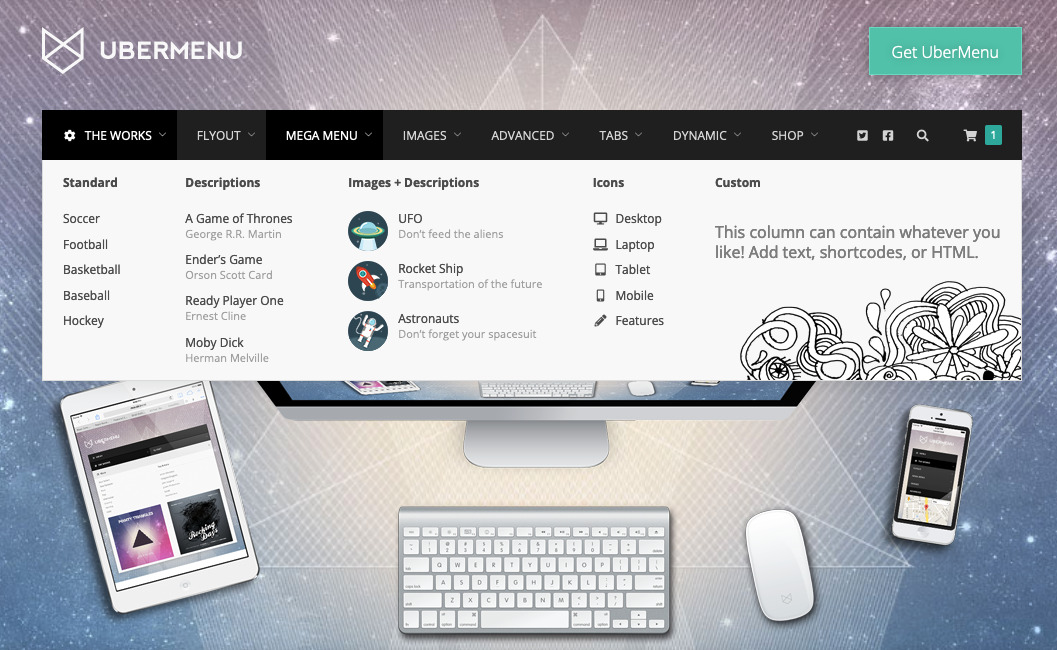
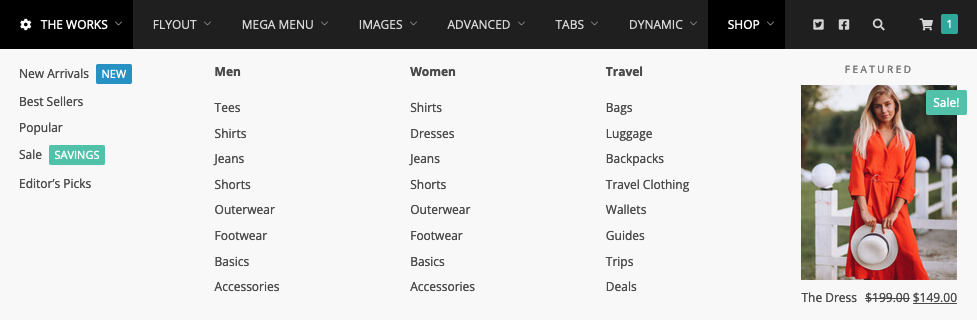
Theme recommendation with technical and visual enhancements for perfect navigation menus without an extra plugin:
5 Questions and Answers
1. Question: Can I have multiple menus on my WordPress website?
Answer: Yes, WordPress allows you to create multiple menus and display them in different areas of your website, such as the header, footer, or sidebar.
2. Question: What is the difference between a regular menu and a mega menu?
Answer: A regular menu typically consists of simple links, while a mega menu can contain advanced content such as images, text blocks, and even videos.
3. Question: My menu is not displaying correctly on mobile devices. What can I do?
Answer: Check if your theme is responsive and if you are using a plugin that might be interfering with mobile navigation. It might also be helpful to create a dedicated mobile menu.
4. Question: What is the maximum number of menu items I should have?
Answer: There is no fixed rule, but it is best to focus on the most important pages or categories. A menu with 5-7 main items is usually clear and user-friendly.
5. Question: Can I add icons to my menu items?
Answer: Yes, many modern WordPress themes and plugins allow you to add icons to menu items to make navigation more visually appealing. SEE ABOVE
Navigation is the backbone of every website and online shop. Clear, intuitive, and user-friendly navigation can make the difference between a visitor staying or leaving. It is worth investing time and effort in designing effective navigation.
Conclusion and Top 5 Tips for Good Navigation
- User-centric: Always think from the user’s perspective. Navigation should be intuitive and easy to understand.
- Simplicity: Do not overload your menu with too many items. An overloaded menu can seem overwhelming and deter users.
- Consistency: Navigation should be consistent across all pages of your website. This builds trust and makes it easier for visitors to find their way around.
- Responsiveness: Ensure that your menu works well and is readable on all devices, especially mobile devices.
- Clear Naming: Use clear and understandable names for your menu items. Avoid jargon unless your target audience is familiar with it.
We would be happy to assist you as a WordPress agency.

Florian Ibe
CEO & Marketing Consultant
Your contact person: Florian Ibe


 DE
DE